

Thursday, July 21, 2011
Happy 3 years
As of July 18th we have been married 3 years! Can't believe it. Seems like just yesterday we were getting married, and yet at the same time it seems like we have done so much. We have gotten in quite a bit a travel (Egypt for one), accomplished a ton of projects on our house, and had so many fun times just hanging out with each other and friends. I can't wait for all the travels, projects, and adventures to come with my best friend. Love you Matt!


Wednesday, June 22, 2011
Paint & Carpet
Last week was a busy one. We spent Saturday/Sunday painting the basement with the primer, and then everything white. Then Monday and Tuesday I painted the main living room light grey and the bar area dark grey (it took 2 days since we did 2 coats and touch ups). My Dad even came down Tuesday night to help me paint which made things go much quicker! And while I worked on this Matt did the covers on all the lights and started finishing out the electrical outlets.
We were on a tight timeline since we scheduled carpet installation for Wednesday, and then had visitors coming that weekend. It all got done though which was amazing! Carpet was installed Wednesday, we got home that night and started moving all our boxes and stuff from upstairs down to the basement so that we could make our office upstairs into a suitable guest bedroom for my friends arriving on Thursday.
And here are a few pictures of the latest basement with paint and now carpet. Next up molding and doors...

It's hard to get a good picture of carpet. But in case you are wondering it's "loop" carpet, from the Martha Stewart line at Home Depot (made by Shaw). We chose the color "Glass of Milk" to keep it light colored in the basement. It's very plush (we got an extra good pad underneath it)... and a great bonus is that it has a 30 year warranty.


You can already see the closet in our future office filling up with suitcases/Christmas decorations/my wedding dress boxed up/Matt's boxes of comics.... at least it's not upstairs anymore!

Monday, June 13, 2011
Paint colors
We are actually painting the basement this weekend/week. Can't believe it. We started on Saturday by painting the whole basement with drywall primer and sealer. Matt was able to borrow a nice paint sprayer from a friend, so I think that made it go pretty quickly.
After many paint samples and going back and forth on colors, I think we have decided on our colors. We want the basement to feel airy and light (not dark since it's a basement) - so we are going with lots of white, with light grey, and some dark grey accents. We also plan to have some yellow accents once we have furniture and decor downstairs... I'm picturing yellow pillows on a dark grey couch, and my yellow glassybaby candles.
So... all of the ceiling and most of the walls (the office and bedroom in the basement for now) will be white... it's actually a shade of off-white which is not pure white, but still seems pretty white to me. Then the whole living room will have light grey walls (which we are hoping will make all of the white moulding really "pop"). And finally the kitchenette/bar area will have a very dark grey wall color, which we think will look cool against the bright white cabinets we plan to get.
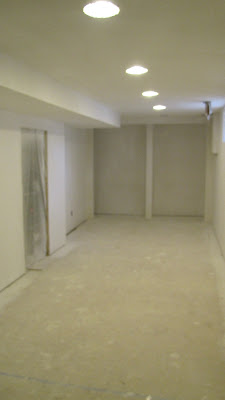
So there you go. Wish us luck! A few last pictures of our white painted basement before the colors go on...


After many paint samples and going back and forth on colors, I think we have decided on our colors. We want the basement to feel airy and light (not dark since it's a basement) - so we are going with lots of white, with light grey, and some dark grey accents. We also plan to have some yellow accents once we have furniture and decor downstairs... I'm picturing yellow pillows on a dark grey couch, and my yellow glassybaby candles.
So... all of the ceiling and most of the walls (the office and bedroom in the basement for now) will be white... it's actually a shade of off-white which is not pure white, but still seems pretty white to me. Then the whole living room will have light grey walls (which we are hoping will make all of the white moulding really "pop"). And finally the kitchenette/bar area will have a very dark grey wall color, which we think will look cool against the bright white cabinets we plan to get.
So there you go. Wish us luck! A few last pictures of our white painted basement before the colors go on...
Office

Living Room (ok not totally white... you can see some grey paint samples we were trying out on the wall)


And.... the final paint swatches... =)

Saturday, June 4, 2011
Basement update: Mud & Tape
I was working from home on Thursday morning this week for a few hours, so that I could meet with our carpet installer and he could do measurements. While waiting for him I took a look in at how the drywall mud and taping is going.
These guys have major skill. Makes me embarrassed to look at the 3 foot patch of drywall we did ourselves 6 months ago when we pulled an old freezer out of our kitchen wall. Oh well, at least I have learned now that this is one project to leave to the pro's. They are so fast, and everything looks perfectly smooth....


These guys have major skill. Makes me embarrassed to look at the 3 foot patch of drywall we did ourselves 6 months ago when we pulled an old freezer out of our kitchen wall. Oh well, at least I have learned now that this is one project to leave to the pro's. They are so fast, and everything looks perfectly smooth....


Wednesday, June 1, 2011
Best day ever... Drywall
We officially have drywall in our basement! It all went in yesterday (all in 1 day) as planned. It will still be another 5-7 days (planning on next Friday) for it to officially be done, since they need to tape and plaster it, and apparently there is drying time needed between each time they plaster and sand it.
In case anyone is wondering, it cost us a total of $3,000 for the whole basement to be drywalled including all the mud and taping. We also saved about $500 by doing all the cleanup of the drywall scraps and taking them to the dump ourselves. Seriously the best money we have EVER spent. SO happy.
Here are a few pictures:
Matt contemplating how amazing a drywalled basement is

The view from our living room

View from the other side of our living room

Looking into our future office.. this room is going to be pretty big (seems larger now that there are real walls for some reason). Can't wait to move our desk and bookshelves down here and make it feel like a real grown up office/library.

The far back guest room... had a difficult time getting a picture of this room, it's not actually that small, but there isn't a light in there yet and was hard getting a good picture from any angle. Still lots of drywall scraps in this picture too.

Monday, May 30, 2011
Last pictures of the basement before drywall
I cannot believe it was 1 year ago this weekend, that we were demolishing our basement and tearing out drywall, wood, cabinets, flooring, insulation.... pretty much everything down to the necessary wood structure and concrete. It has been a crazy year with lots of surprises and frustrations. But we are almost done! We can't believe it.
This weekend we did some very last things to get the basement ready to be drywalled (the drywall crew was scheduled to come and there was no more delaying things!). We finished any last electrical projects we wanted done before drywall, including wiring lights for above the future bar as well as wiring cable/internet/electrical behind our walls so that when we finally mount our TV on the wall there will be NO cords hanging on the wall... anywhere...yessss.
Matt worked quite a bit on final framing to make sure there weren't any spots that would be a problem for the drywalls to install, and there was also a lot of just general clean up this weekend.
Today (Monday) we insulated the ceiling of the entire basement. With the help of my wonderful parents (who volunteered to spend their entire memorial day helping us do this today)... we got the entire basement insulated in just about 5 hours, faster than I expected, but also dirtier and itchier (even wearing goggles and a mask that stuff gets everywhere and it is itchy!) And then we celebrated with some BBQ'ing.
Finally, I took about 200 pictures (literally) so that if we ever need to know where things are behind the walls we can refer to the photos first before ever having to cut into the drywall later. Matt had me take a picture from each direction going between every beam (I think that was about 80 pictures...), and then we took lots of extra pictures of all the the plumbing and electrical in the walls.
Anyhow... here are just a few pictures of the rooms to enjoy, before it is all white and drywalled tomorrow! We will keep everyone updated on the progress over the next few weeks.
Part of the future living room and bar/kitchenette

The other half of the living room on the other side of the stairs.

Looking into our future office (the extra large door opening will be for french doors)

Another look at where the bar will be.

Stairs coming down into the basement.

Sunday, May 29, 2011
When you let your wife organize the tools...
One of my projects this weekend while we got everything ready for the drywallers to come on Tuesday, was to get all the tools organized and everything moved upstairs. Matt gave me free reign while he finished working on other things.
For some reason he found it really funny that I chose to get plastic bins at Target and to label them (organized in a way I thought made sense.... small tools like wrenches and screwdrivers in the small box, metal tools like hammers and saws in one large box, and all other supplies like extra caulk and plastic parts in another). Apparently this is not how he would have done it... but whatever, it works! =)
*I wish these were the only 3 boxes of tools we had, I have to caveat that this does not include all of Matt's power tools, or his tool bin with 50 different types of nails/screws/bits, as well as the 10 gallons of half empty paint cans I am keeping (in case we ever need them... haha).

Subscribe to:
Posts (Atom)